This post is originally from 2023 but for some reason I never actually posted this draft.
I recently started doing a lot of woodworking to try and get away from the computer a bit more. One of the things I needed was a better cutting surface as the lengths of wood I was working with were too large to manoeuvre or cut in my shed due to me having a crap ton of stuff in there.
My granddad used to have a large collection of cutting horses around the place but due to being left outside during the great Scottish Winters, they started to rot and fall apart so weren’t sturdy enough to use for cutting. There was tutorials online for creating updated versions but I decided to go with the classic (the one I always saw growing up) look.
You can do whatever size you want. Mine is quite large because I needed a big one for my needs, but you could quite easily half the size I made and make two.
Materials Needed
- 2x 11ft Decking Joists (or similar, you can use anything, but this is what I used as I had some left over from dismantling a shed)
- Nails or Screws – I used 6 inch Round Screws similar to these
- Hammer
- Hand Saw or Electrical Saw
If you decide to use screws instead of nails, I highly recommend having an electrical drill to pre-drill the holes and then screw them in. If you screw them in without pre-drilling, you may crack the wood.
Build Process
Once you have your materials together you will want to start by cutting the wood to size, again, theses are the measurements I used but feel free to adjust to your requirements.
| Part | Quantity |
|---|---|
| Top | 1 |
| Bottom Sides | 2 |
| Leg | 2 |
| Feet | 2 |
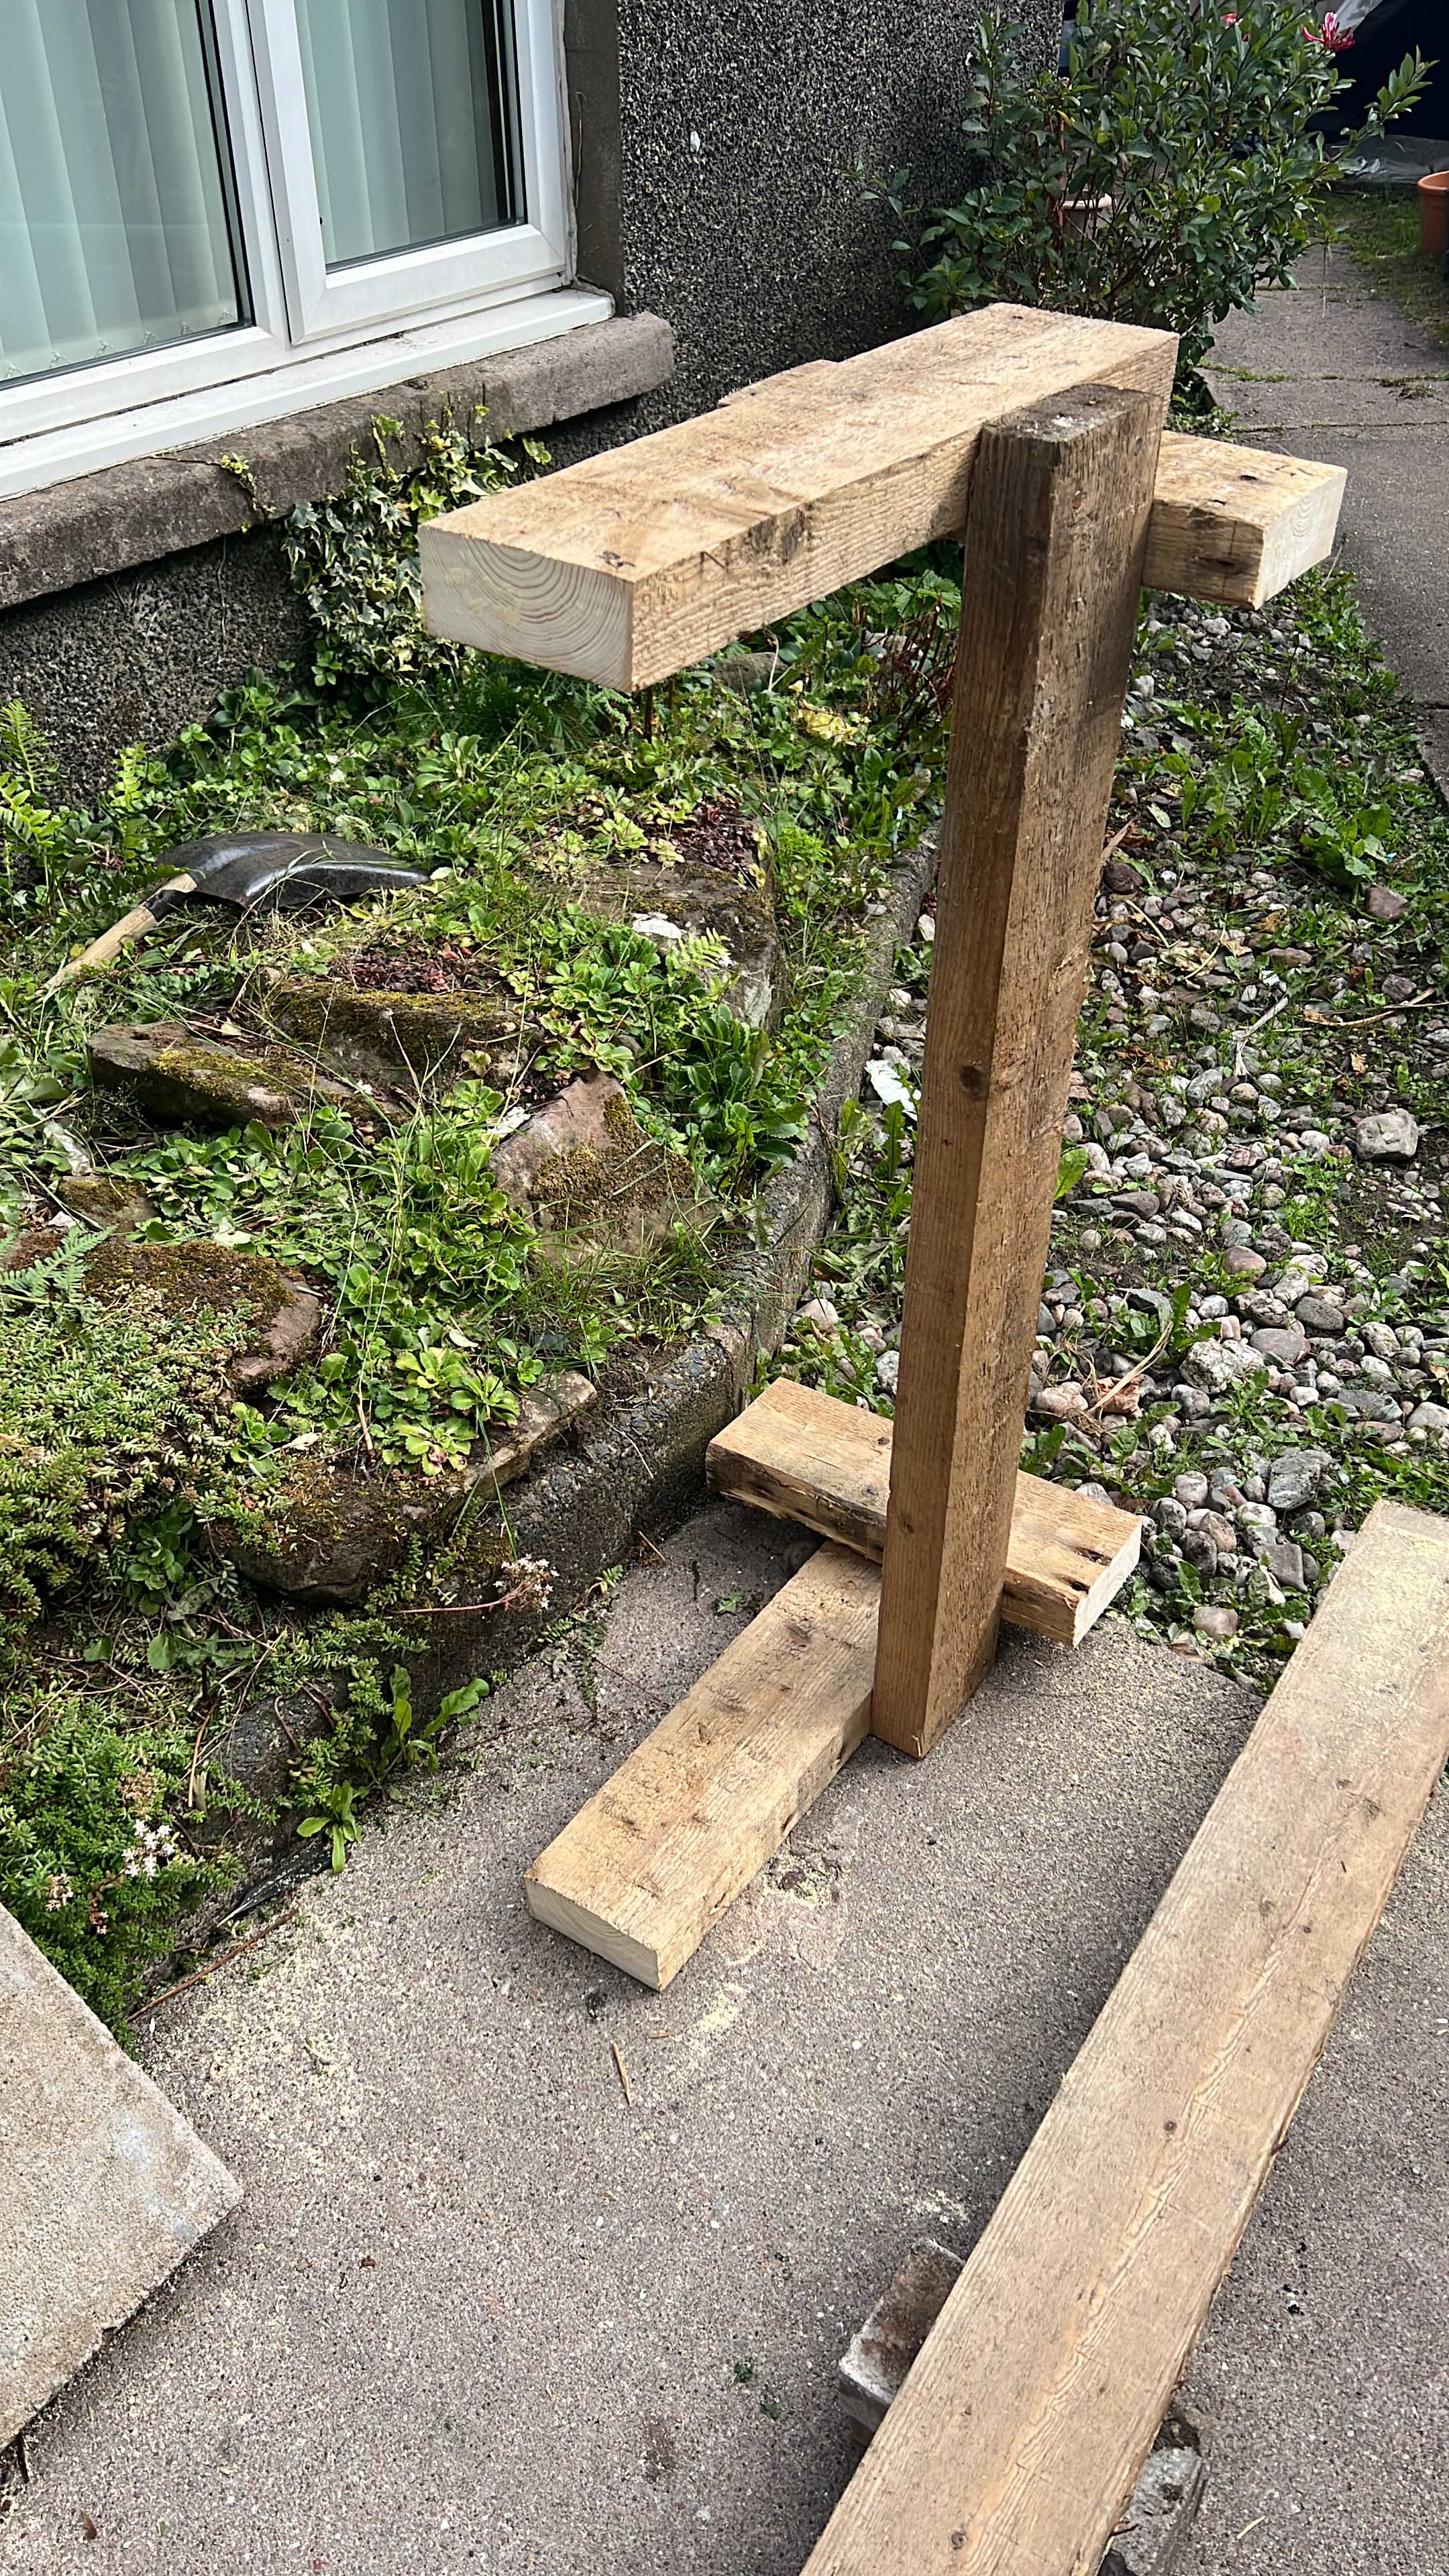
Once you’ve got your wood cut to size you will want to start with attaching the feet to the legs. You can either have the feet on the outside or the inside, I chose to go with the inside as it felt sturdier, but choice is yours.
You will then want to attach the two legs together with one of the bottom side strips that you cut previously; it should look something like this.
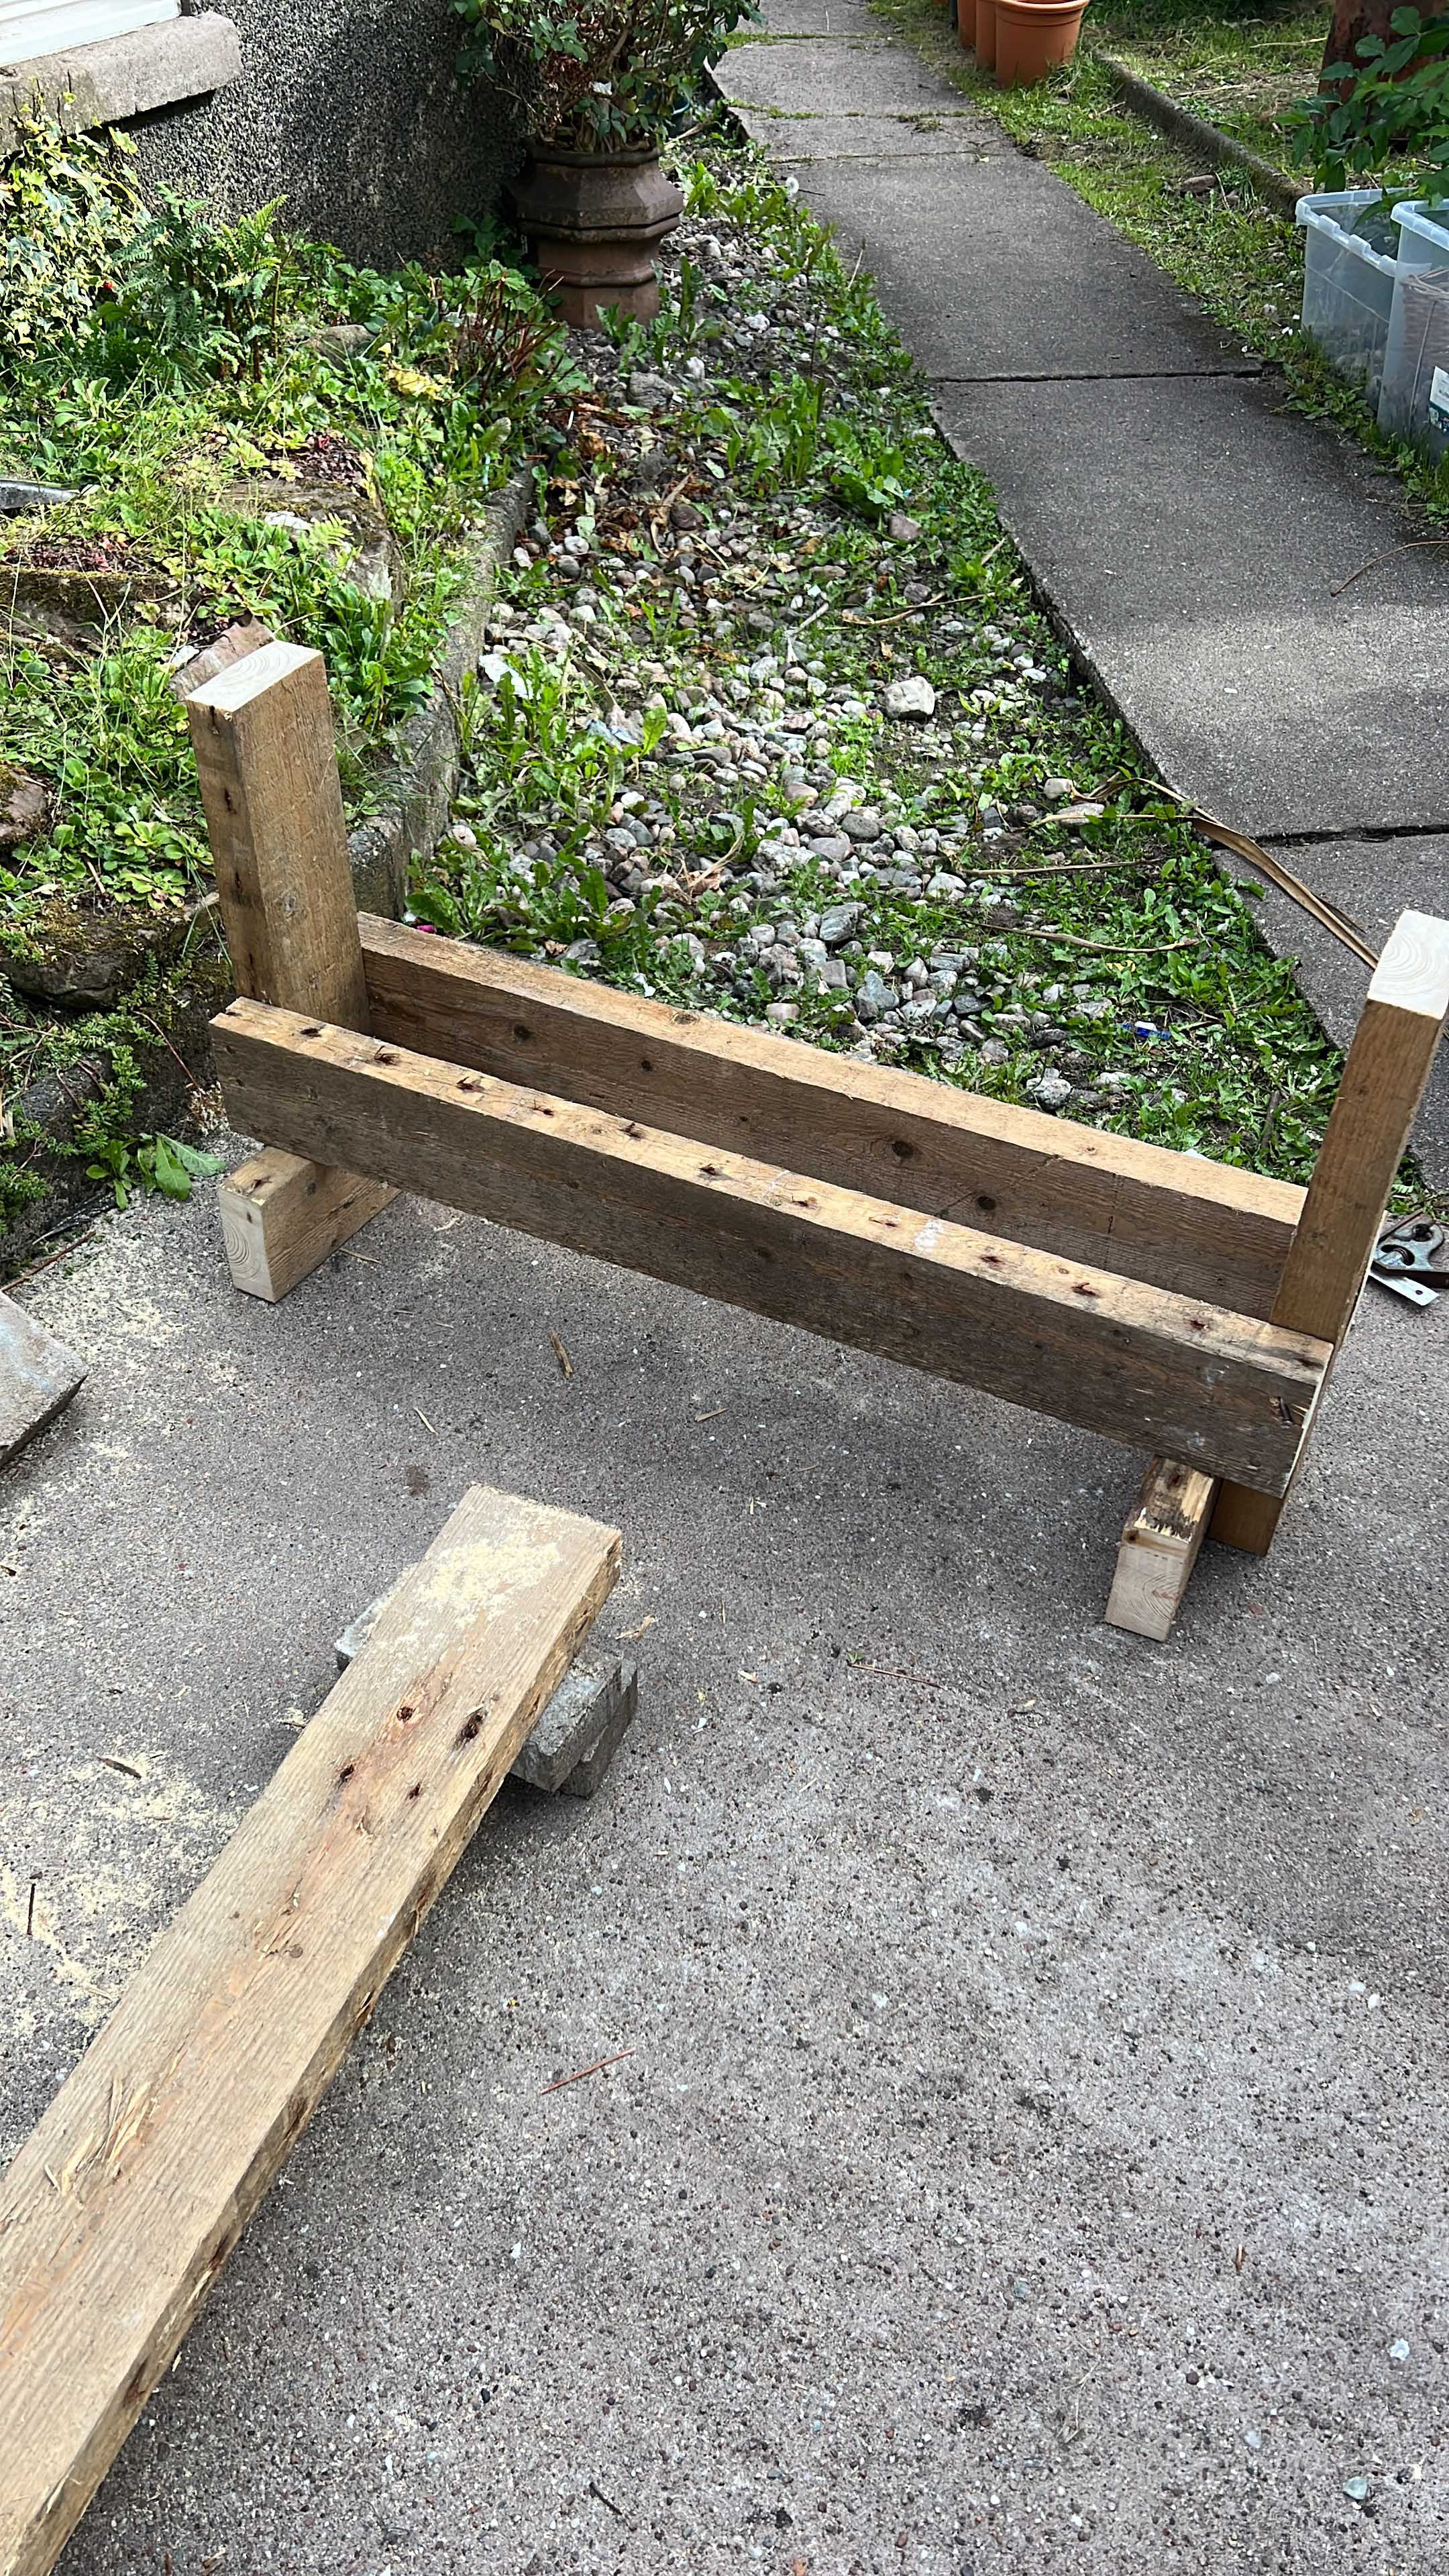
You’ll then want to attach the bottom side strip on the other side and stand it up which will then look like this.
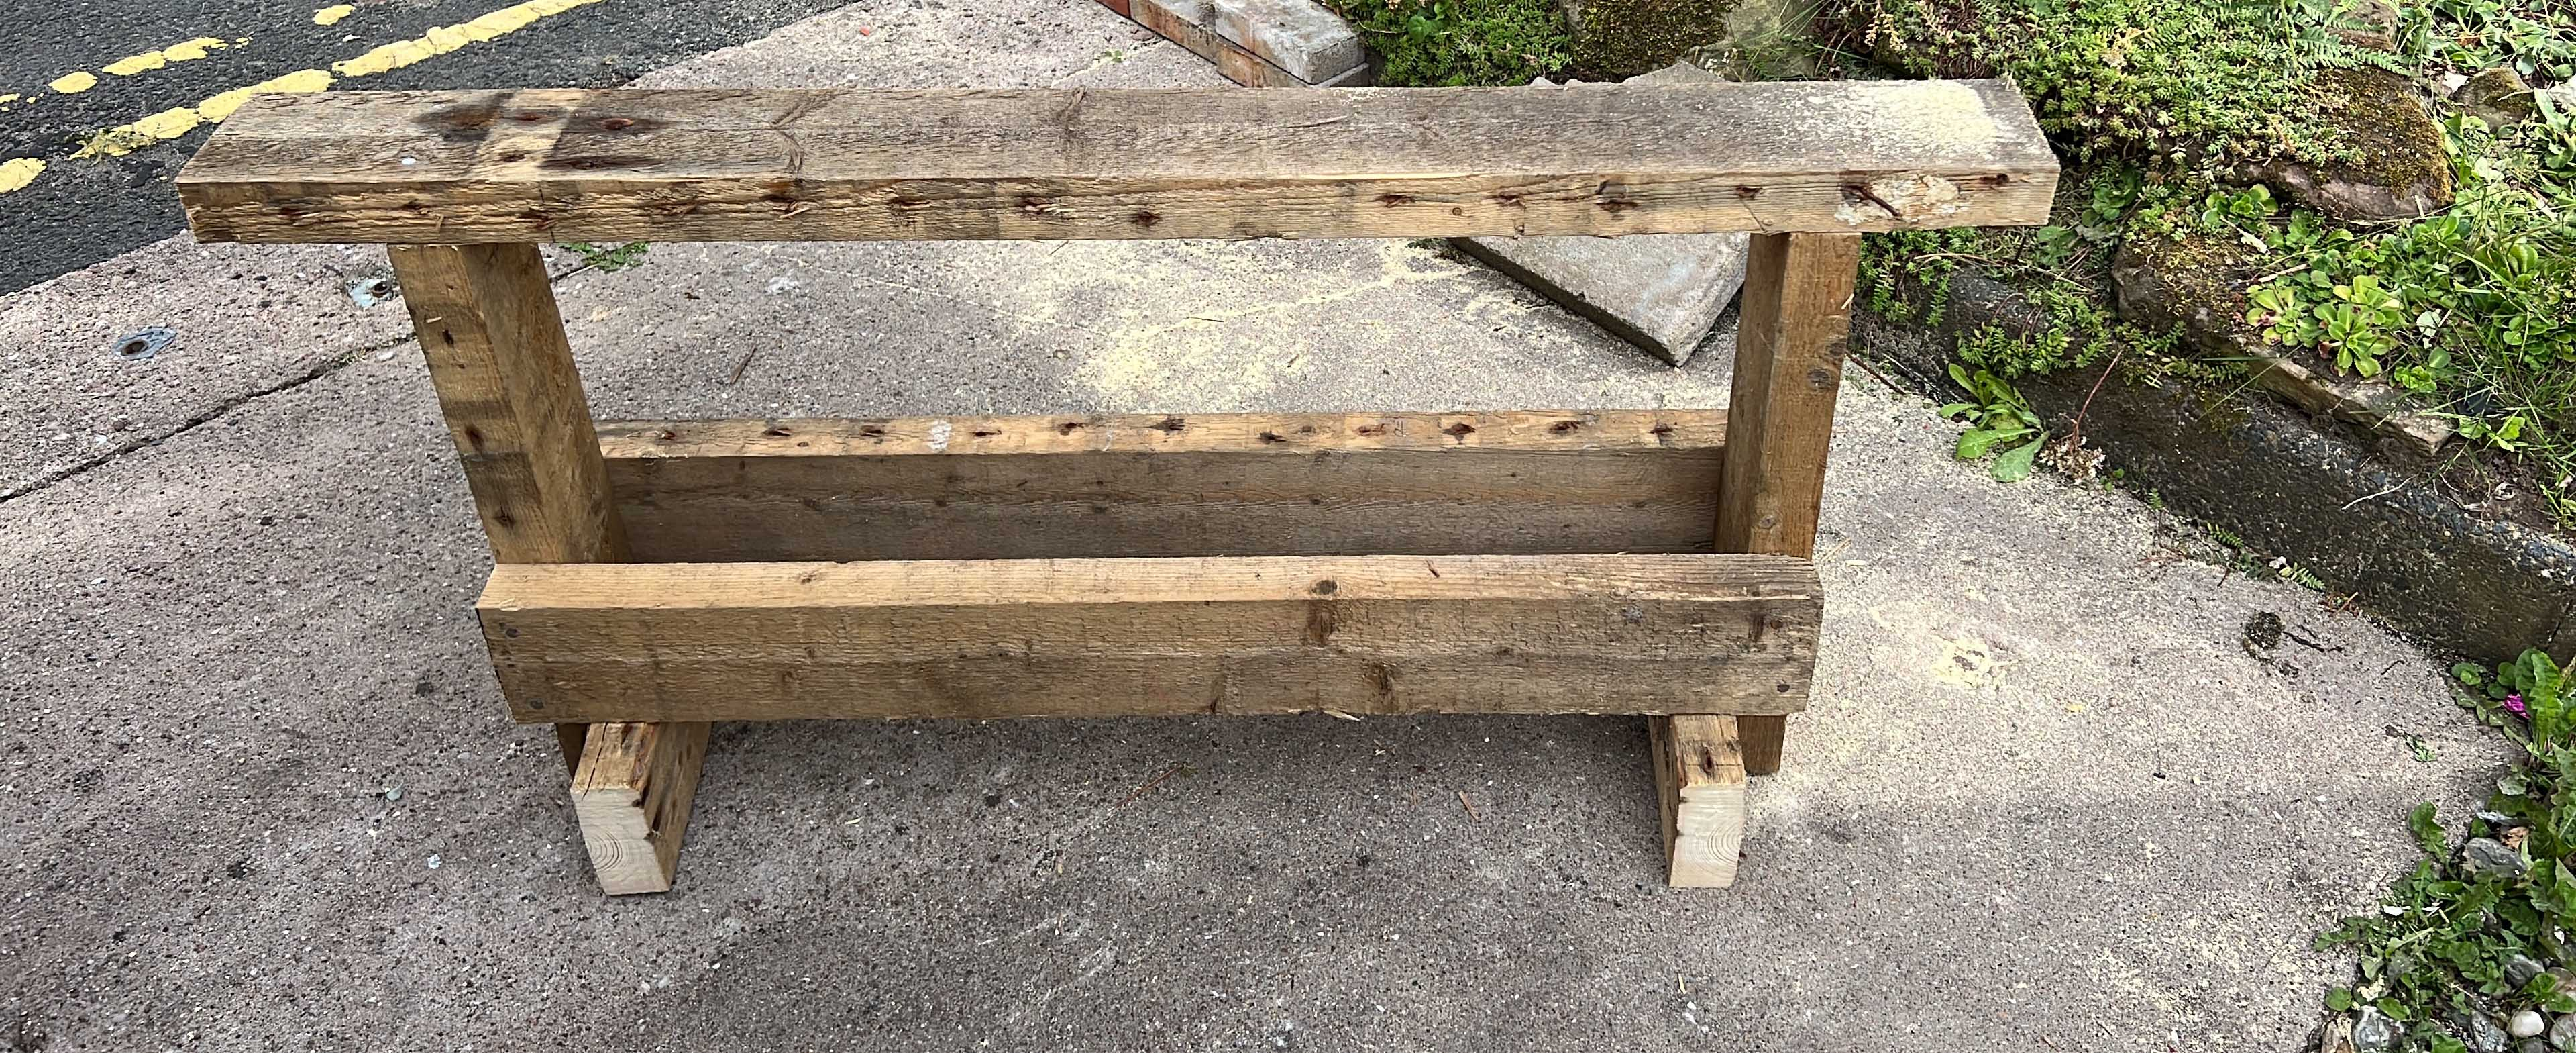
The last section is putting the top on, its your choice if you want an overhang however if you don’t, you’ll need to adjust the sizing of the piece of wood you cut.
Volia. You now have a sawhorse. Based on the measurements I’ve used you could actually cut this in half length wise and create two more legs and have two small saw horses, but it depends entirely on what you’ll be using them for and if you need bigger ones or if you’d be happy with two smaller ones, it’s also less wood and less expensive if you’re needing to buy new timber to make it rather than any leftover stuff you have.