I assume that you have heard of Sonarr, Radarr and Prowlarr if you’ve found this post, but on the off chance that you haven’t Sonarr and Radar are internet PVR’s for Usenet and Torrents. Sonarr is for TV Shows, Radarr is for movies and Prowlarr is an optional Index Manager/Proxy that allows you to to integrate into other *arr products, in this case Sonarr and Radarr.
The full stack that we’ll be configuring in this tutorial is Sonarr, Radarr, Prowlarr and Transmission which will allow you to download the torrents that Sonarr and Radarr request.
Requirements
- QNAP that supports Docker (reqs)
- SSH Access to your QNAP
- About half an hour of your time
Getting started
To make this easier, I have uploaded two docker compose files to GitHub. docker-compose-arr and docker-compose-full, it is entirely up to you which one you use but the full one also includes some steps for configuring Transmission behind OpenVPN to prevent your network provider from seeing what you’re downloading, as well as a Cloudflare Bypass container as certain Trackers such as The Pirate Bay have cloudflare that will prevent your *Arr stack from being able to pull torrents. You can follow the tutorial for whichever option you use, however.
Set up
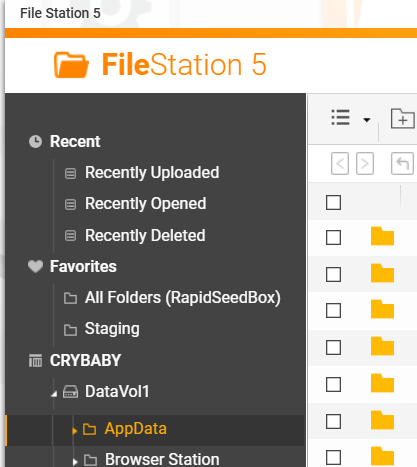
First things first, connect to your QNAP via the web browser and open File Station. Create a shared folder and name it whatever you want, for this tutorial though I will be referring to it as AppData. This is where you will store all of your configuration files and data for each of the containers. Within the AppData directory, create the following directories: Sonarr, Radarr, Prowlarr, Transmission.
Note that in my docker compose I use the full path of
/share/CACHEDEV1_DATA/AppData/Sonarr, but you can in most cases just do/share/AppData/Sonarr. I would however recommend using the full path.
Download the docker compose file that you’re wanting to use from GitHub as mentioned above and open it in your favourite editor, I would recommend VS Code or Notepad++ and note standard Notepad on Windows. With the docker compose file open you are going to want to go to each container within the compose and modify the volumes if they do not match what your system has.

These paths are where your configuration files and data will be stored, in the case of Sonarr and Radarr, it will also be where your Media is stored on your QNAP. In my case for movies that is /share/CACHEDEV1_DATA/Multimedia/Movies, where Multimedia is the Shared Directory and Movies is a sub-directory. Radarr, Sonarr and Transmission all need to have access to your Download directory.
If you are using the docker-compose-full file, you can read the very easy to understand documentation here for configuring the container with your OpenVPN credentials from your VPN provider.
Your system may not use
CACHEDEV1_DATA, if it errors on that path docd /shareand find the relevant directory in there - you may be able to just do/share/AppData
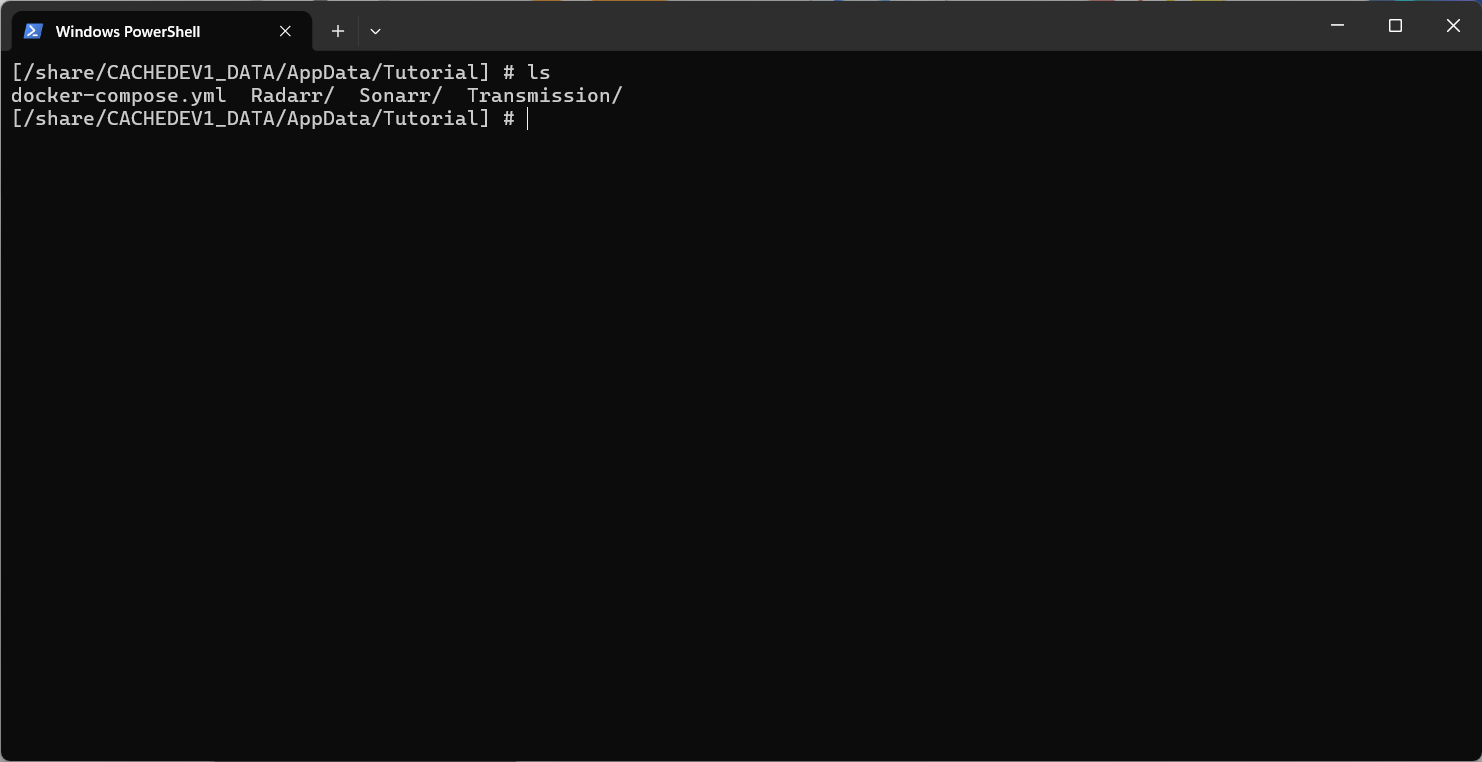
Once you have created your configuration file and are happy with what is in there, rename it to docker-compose.yml upload it to the root of your AppData directory via File Station and then open Terminal on your PC and SSH into your QNAP. Once connected, enter Q and then Y to get past the weird QNAP introduction screen. Enter the following command cd /share/CACHEDEV1_DATA/ and find the shared directory that you created earlier, in my case this is AppData. Run ls and you should see something along these lines1 >
If you’re happy with what you see, run docker-compose up -d which will start all of the containers. It may take a few minutes to start as it needs to download the images from the relevant locations, but once they’ve started you should be able to go to each of the containers in your browser - in the URLs’ below, replace ‘hostname’ with the address you use for accessing your QNAP Web UI.
- Sonarr: http://hostname:8989
- Radarr: http://hostname:7878
- Prowlarr: http://hostname:9696
- Transmission: http://hostname:9091
Configuration
Sonarr and Radarr
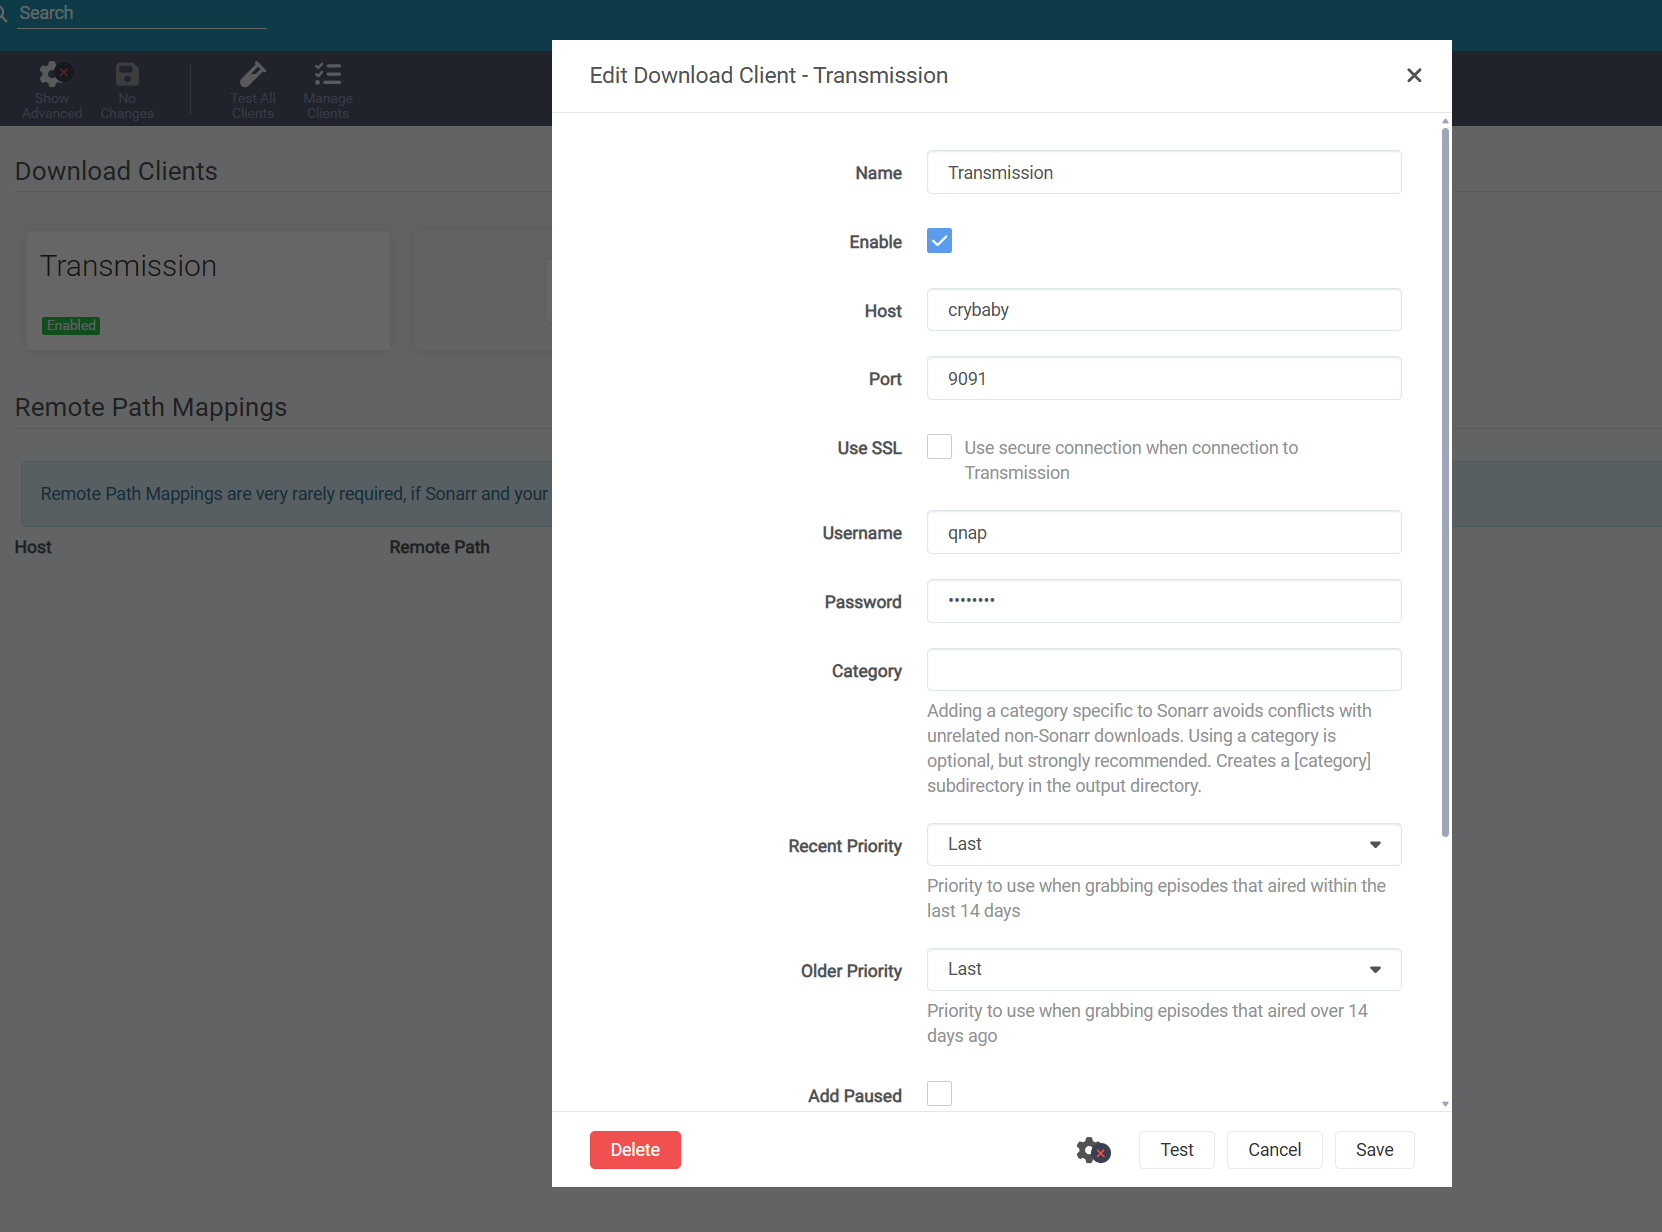
Configuring Sonarr and Radarr is identical, so use these steps for both apps. Go to Sonarr or Radarr in your browser and click Settings on the left, and then Download Clients. Click the big plus button and enter your information for your Transmission container. If you didn’t change ports, etc. you should be able to copy this 1-1 minus changing the hostname. Confirm it works by clicking Test, then Save.
After you have configured the Download Client, click General on the left under Settings. Here you can configure Authentication to prevent anyone from being able to access the app, I personally use the Authentication Type Forms (Login Page) with a username and password, this section is self explanatory.
While under this page, take a copy of the API key for both Sonarr and Radarr, as you will need this later for configuring Prowlarr.
Prowlarr
If you’re not using the docker compose that contains FlareSolverr, skip to the bottom of this section on how to add Sonarr and Radarr to Prowlarr.
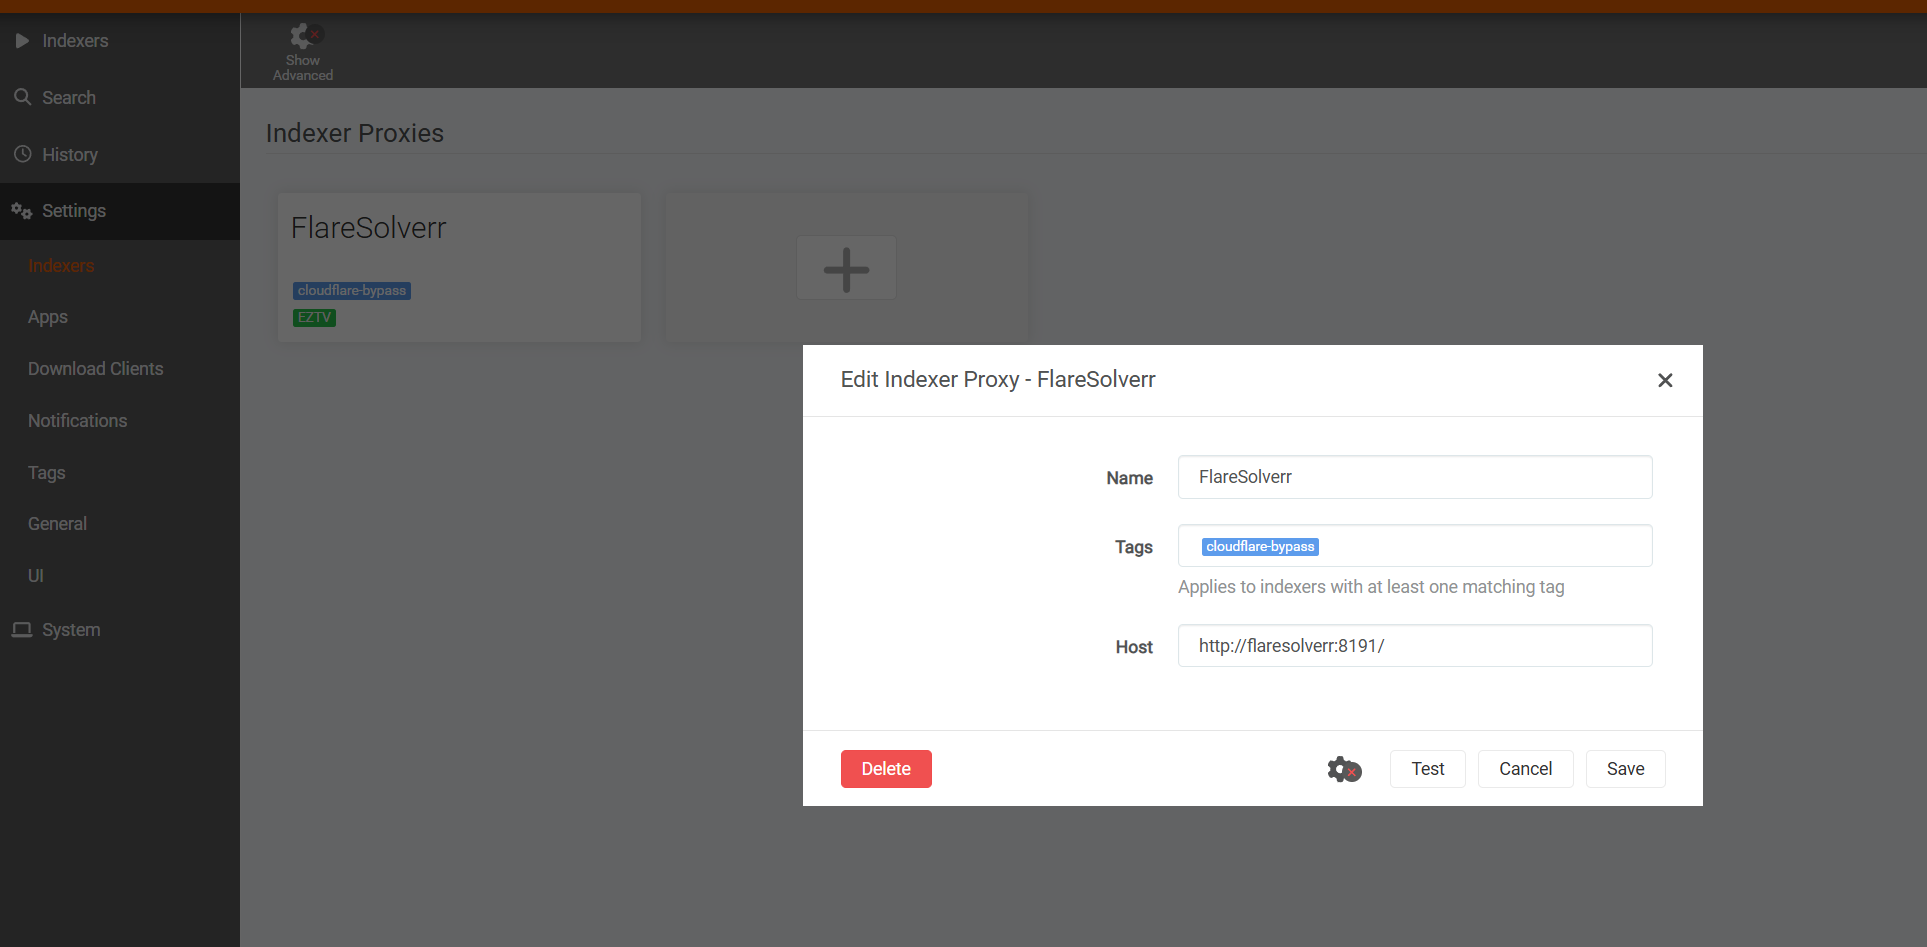
As mentioned earlier, Prowlarr is what you’ll use for manging your trackers/indexers. Open Prowlarr in your browser and click Settings on the left and then Indexers - click the big plus button and Add Index Proxy should appear, click FlareSolverr and enter per the screenshot below, then click test/save.
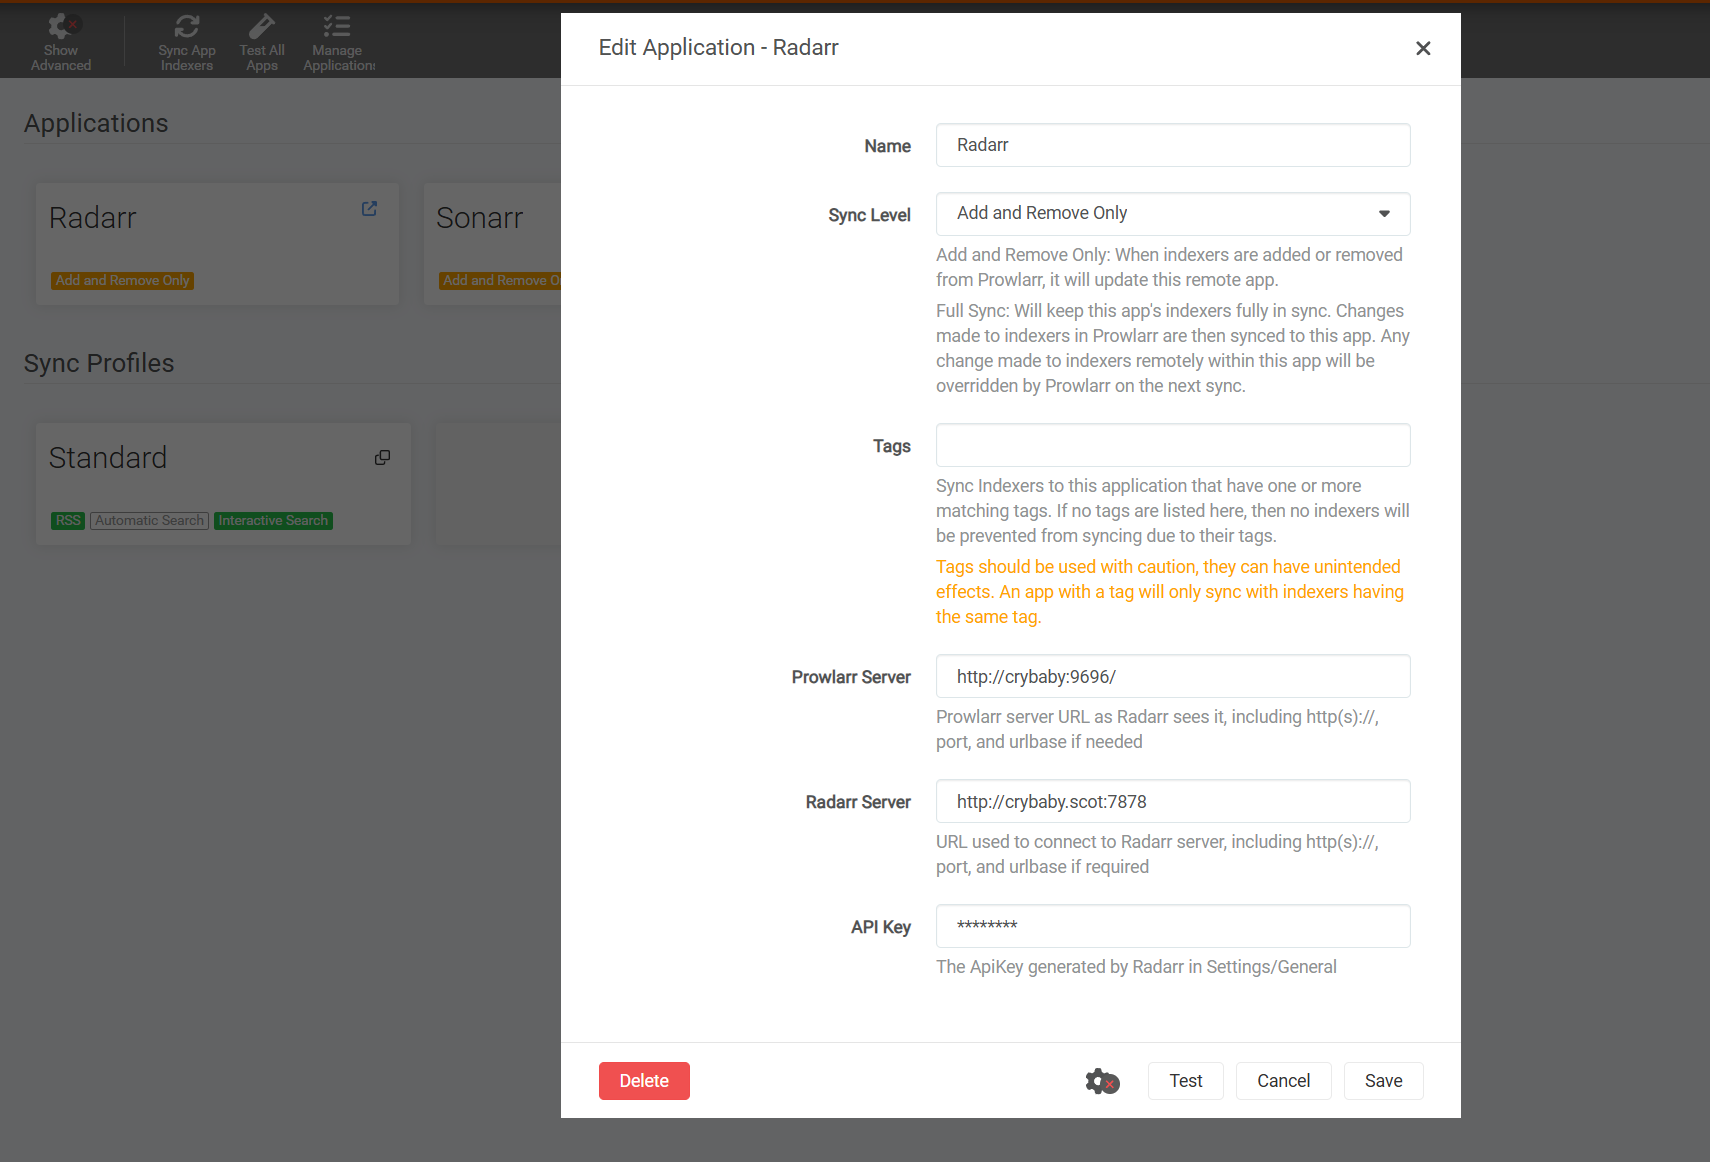
Click on Apps on the left under Settings and click the big plus button again. Here is where you’ll add the link between Prowlarr and Radarr, and Sonarr. Add Radarr first with the following settings, replacing the hostname with your hostname and the API key you saved earlier. Do the same thing with Sonarr, replacing the port with the Sonarr port and using the API key saved earlier for Sonarr.
Go back to either Radarr or Sonarr, add a TV Show or Movie and try grab a release - it should all work now!
If you need any help configuring or have any issues, ping me a message at webmaster @ laim.scot.
Mine shows ‘Tutorial’ as a directory as that’s where I put it for this tutorial, but yours should be in the AppData root directory. ↩